How to Find and Delete Blank Rows in Microsoft Excel

If you need to clean up your spreadsheet for analysis, you might have to take a bit of time to find and delete blank rows in Excel.
When working with data in Microsoft Excel, you may come across missing data rows. This can happen easily if you import data from another location or have multiple people working on the same sheet. But you don’t have to live with those blanks. Remove them to keep your sheet consistent and correct for analysis.
Here are several ways to find and delete blank rows in Excel. Feel free to either watch the video or follow the step-by-step guide below. Use whichever is most comfortable or convenient for your particular sheet.
How to Delete Blank Rows in Excel
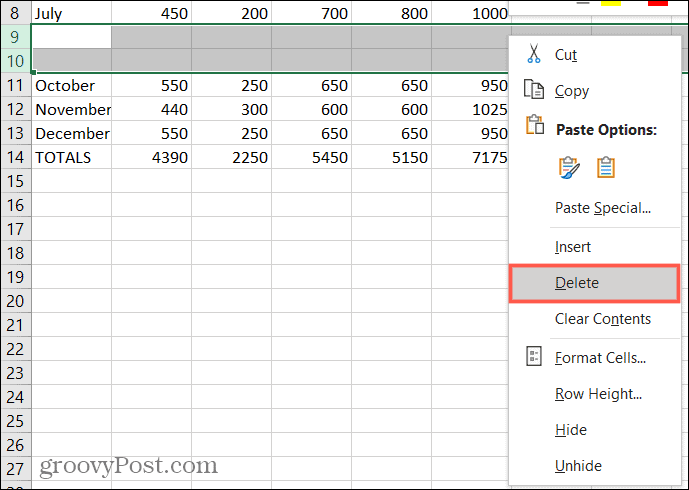
Sometimes it’s easiest to remove a blank row that we see. If you don’t have a lot of data in your sheet, this may also be the quickest way. And you can use a few methods to delete Excel rows.
Select the row and do one of the following:
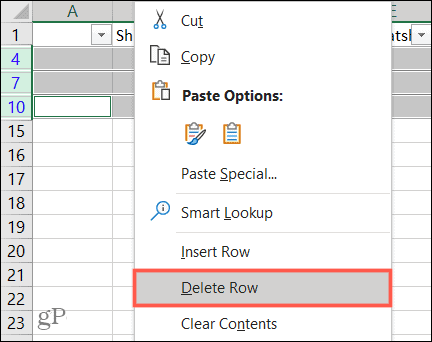
- Right-click and choose Delete or Delete Row.
- Click Delete > Delete Sheet Rows in the ribbon on the Home tab.
- Use the keyboard shortcut Ctrl + Hyphen (-) on Windows or Control + Hyphen (-) on Mac.


If you spot several blank rows, you can remove them all at once. Hold your Ctrl/Control key as you select each row. If the rows are adjacent, you can drag your cursor through the range to select them. Then use one of the above actions to remove them.

How to Find Blank Rows in Excel
If you have a spreadsheet full of data, finding blank rows manually can be time-consuming. In this case, use one of the options below to find the blank rows. Then remove them with one of the above methods.
Find Blank Rows Using a Filter
One way to find blank rows easily is using a Filter in Excel.
- Select a column or column header in the cell range containing blank rows.
- Go to the Home tab, click Sort & Filter, and choose Filter.
- This places a filter arrow next to each column header in your range. Click one of these arrows to open the filter options.
- Below the Search option, click Select All to deselect all of the options. Then mark only the option for Blanks.
- Click OK to apply the filter.
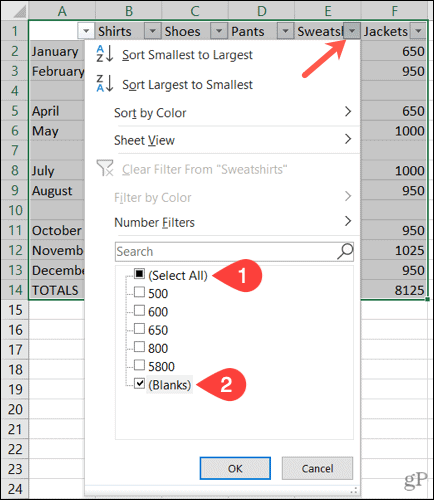

You should then see all of your blank rows with blue highlighted row numbers.
Select the rows separately, or use the Ctrl key to select them. Do not drag through to select them because this will include the hidden data. Then, use whichever method above is simplest to remove them.

Find Blank Rows Using a Sort
Another way to find and remove blank rows in Excel is by using the Sort feature. In this case, you want to select the range of cells or rows, not the columns.
- Select the cells or rows by dragging your cursor through them.
- Go to the Home tab and click Sort & Filter.
- Choose one of the first two sort options, Sort A to Z or Sort Z to A.


When your data is sorted, you’ll see the blank rows appear at the bottom of the cell or row range you selected. From there, you can ignore them, or if you need to resort to the data, you can use one of the manual options above to remove them.


Find Blank Rows Using Find
The Find feature in Excel is handy for more than finding specific values or text. You can also use it to find blanks.
- Select a column or range of cells in a column that includes blanks.
- Click Find & Select > Find on the Home tab.
- In the pop-up window, click Options and complete the fields as follows:
- Find what: Leave this blank.
- Within: Select Sheet.
- Search: Select By Rows.
- Look in: Select Values.
- Check the box for Match entire cell contents.
- Click Find All.
- You’ll see the blank rows listed in the results at the bottom of the window. To highlight all of those results on your sheet, select them all using Ctrl + A.
- You can then click Close in the Find and Replace window.
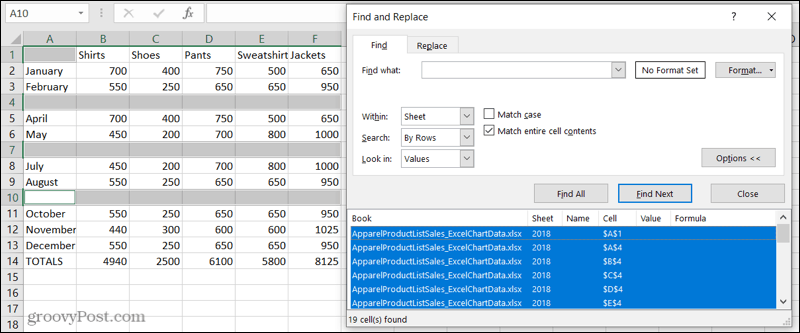

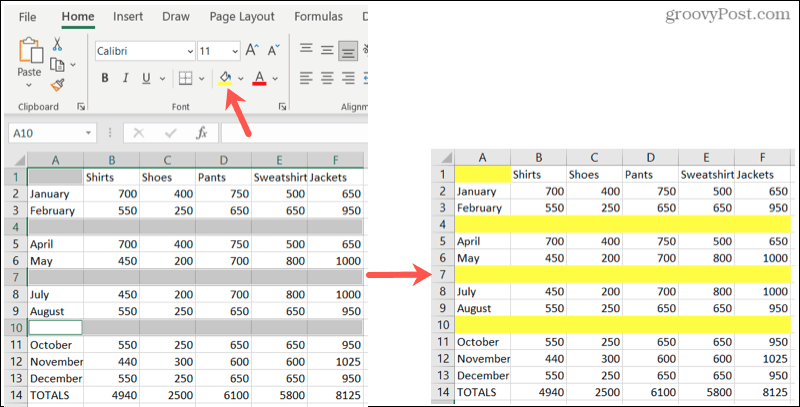
If you click away, those highlights will disappear, so it’s best to mark them right away.
To mark these for deletion, pick a Fill Color in the Font section of the ribbon, also on the Home tab. Now, you can click anywhere without losing the blanks you found and then delete those rows.

Find Blank Rows Using Go To Special
Similar to Find, Go To Special helps you find blanks. The nice thing about this option is that it highlights all the blanks at one time. So you can quickly mark them and then delete the rows.
- Select the columns or range of cells that includes blanks.
- Click Find & Select > Go To Special on the Home tab.
- In the pop-up window, mark the option for Blanks.
- Click OK.
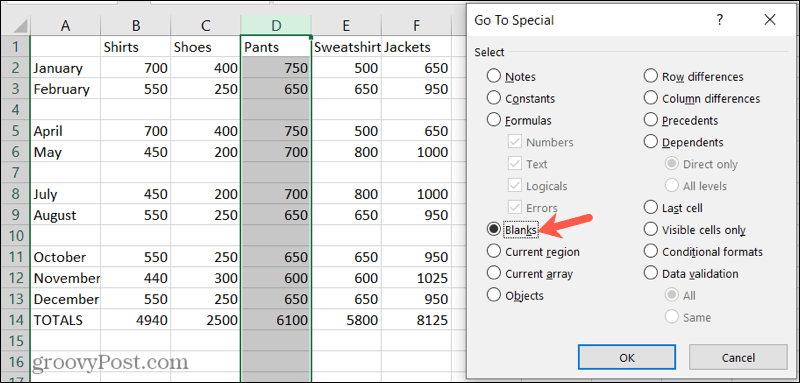

You’ll then see the blank rows in your selected data. Like the Find feature above, the highlighted blanks will vanish if you click away. So again, quickly apply a Fill Color from the Home tab to mark them for deletion.


Easily Eliminate Blank Rows in Microsoft Excel
When it comes time to analyze and manipulate your data, those blanks can get in the way. You can keep your sheet nice and neat with these helpful ways to delete blank rows in Excel.
For related articles, take a look at how to freeze, hide, and group columns and rows in Excel.
Leave a Reply
Leave a Reply
