The free way is the best
Performing reverse image searches is advantageous on many fronts. With a few clicks or taps, you can easily find the origin of a picture, verify its authenticity, track duplicates, or identify objects in a photo. If it’s your first time hearing the term, our Reverse Image Search explainer has everything you need to know about the technology.
What you’ll learn in this tutorial are the different ways to search by image on iPhone or iPad. Many people rely on web-based tools to execute reverse image searches, but dedicated search apps are a lot better. They often have sophisticated features and enhanced technologies.
Google App (Free)
The Google app client for iOS and iPadOS is feature-packed but quite underrated and underused. Here’s how to use the app to perform a reverse image search:
- Download and install the Google app on your iPhone or iPad from the App Store.
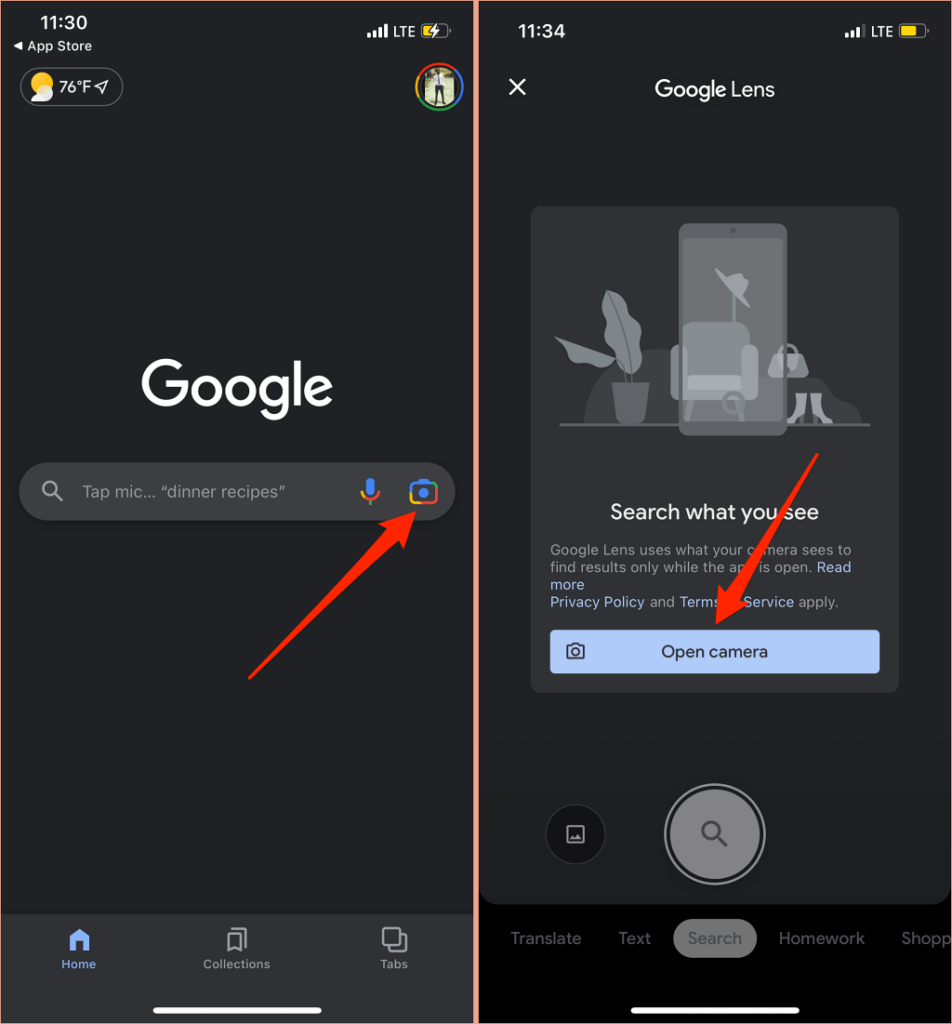
- Tap the camera icon in the search bar and select Open camera.
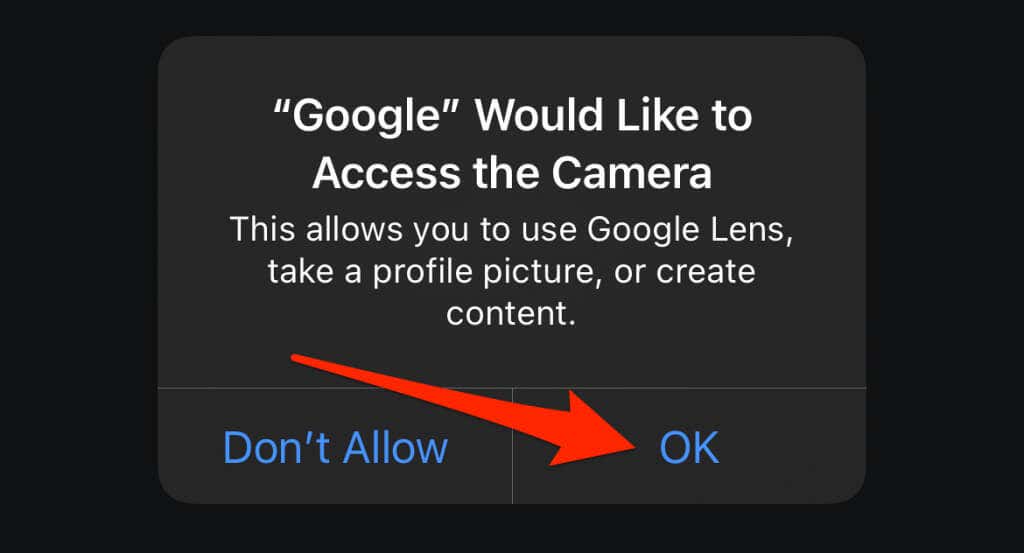
- You’ll need to grant the app access to your iPhone camera if it’s your first time using the app to perform a reverse image search. Select OK to continue.
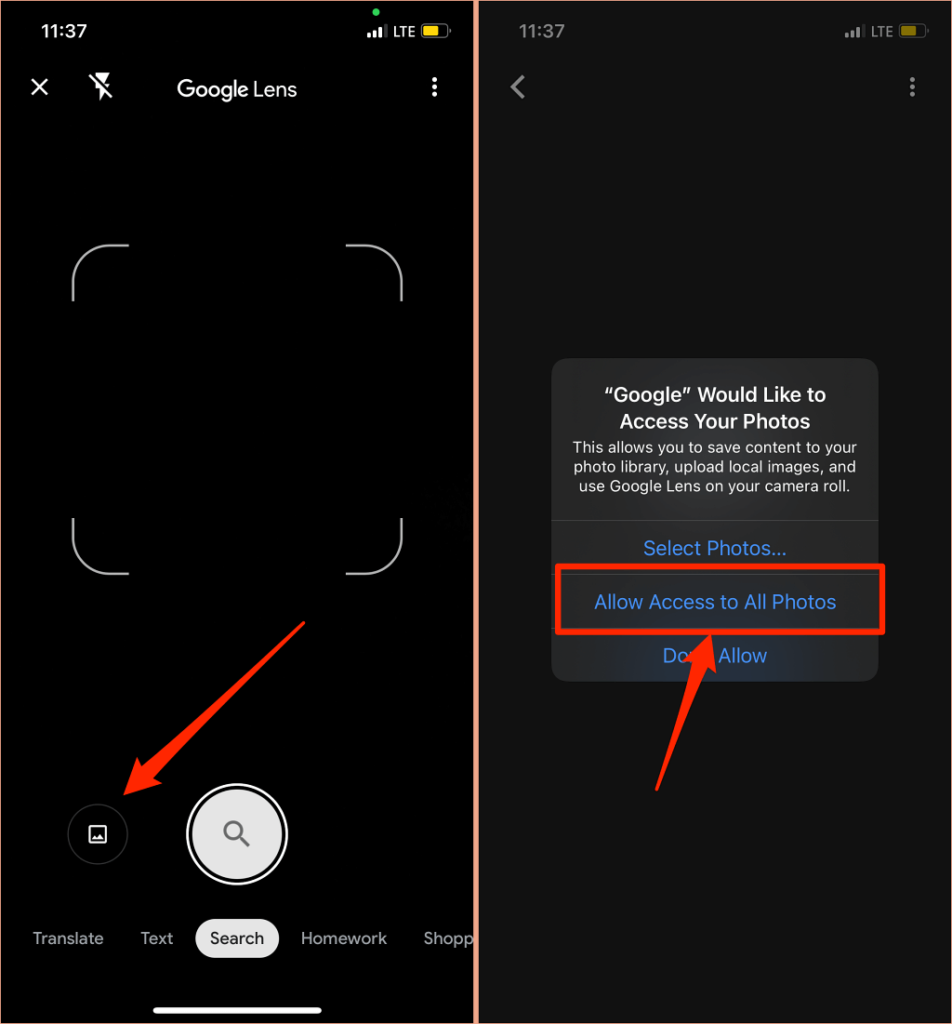
- Tap the image icon next to the search icon and select Allow Access to All Photos to grant the Google app permission to your media library.
- Finally, select the image and wait for Google’s reverse image search engine to process and display results.
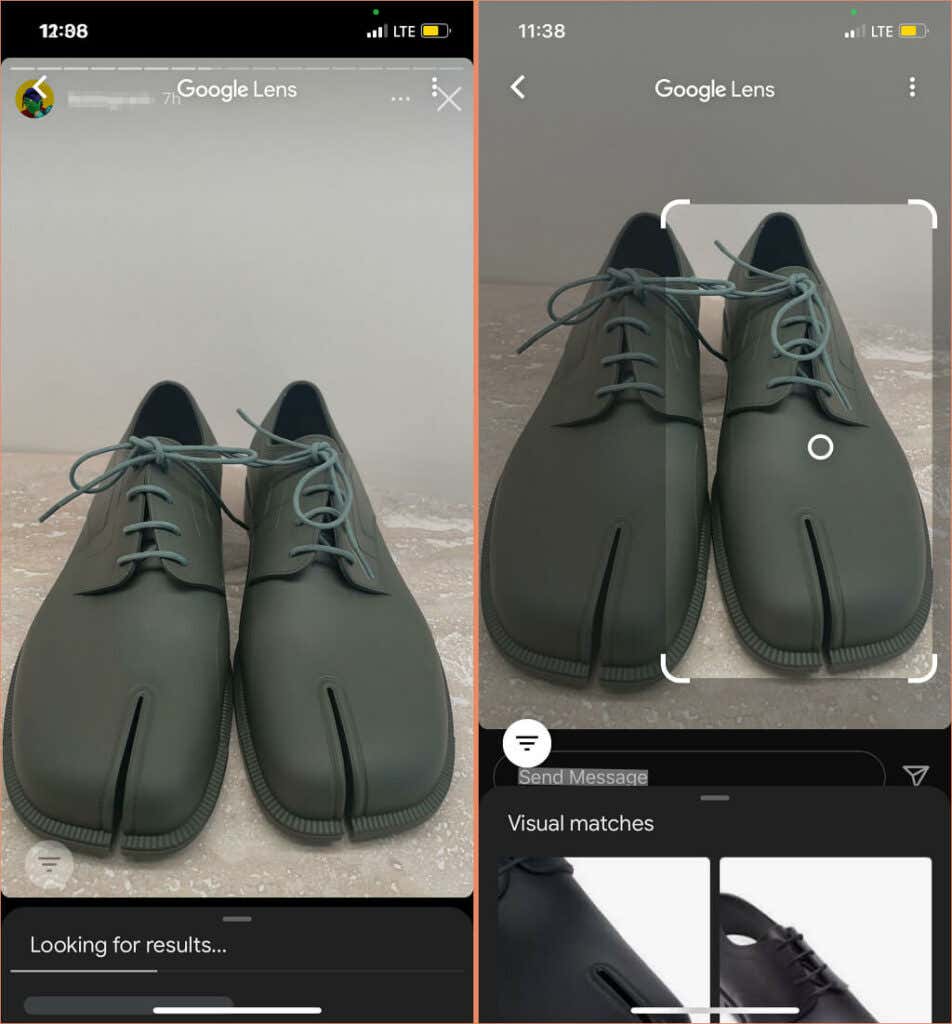
Note that the Google app’s reverse search engine may only capture a section of the image, but the results of our experiments are pretty accurate. According to Google, the app captures a smaller area on the image by default to provide more specific results. But you can always readjust the captured section of the image by resizing the highlight.
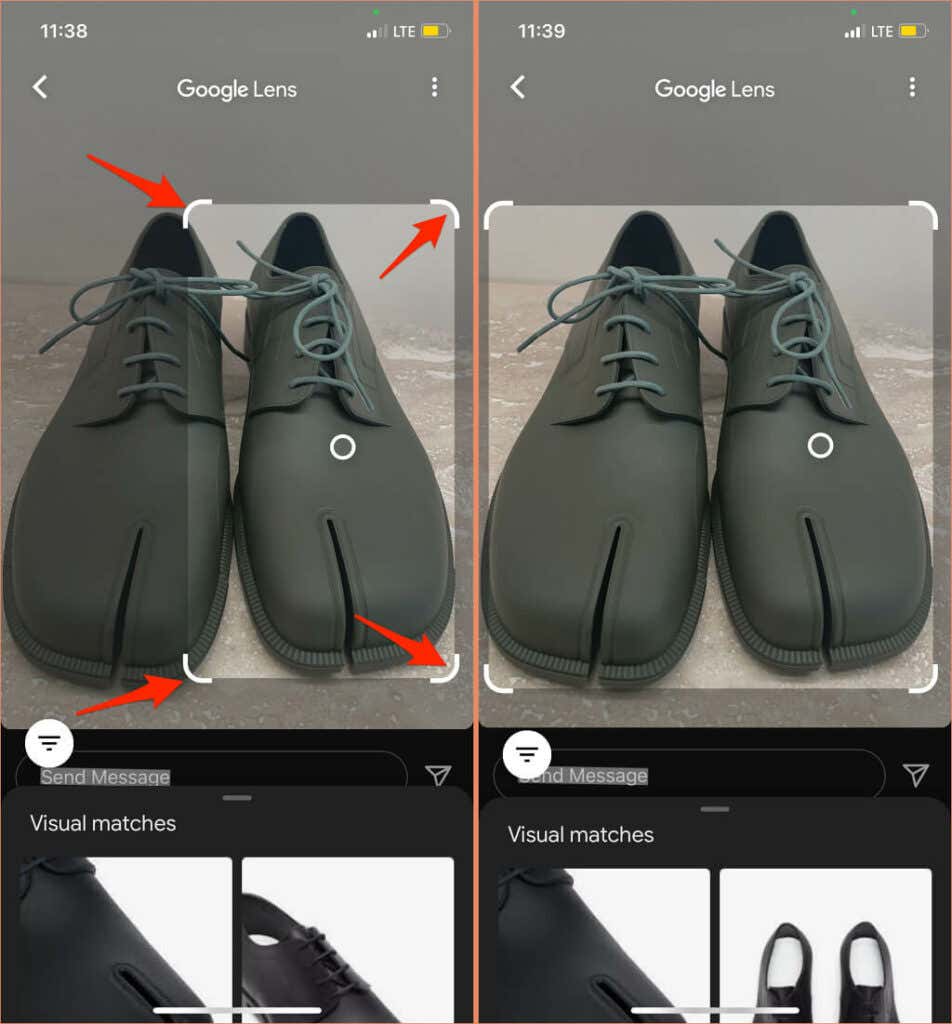
Drag any of the four corners to capture more area of the screen and release your finger from the screen. The Google app will refresh the reverse search and reload the search results.
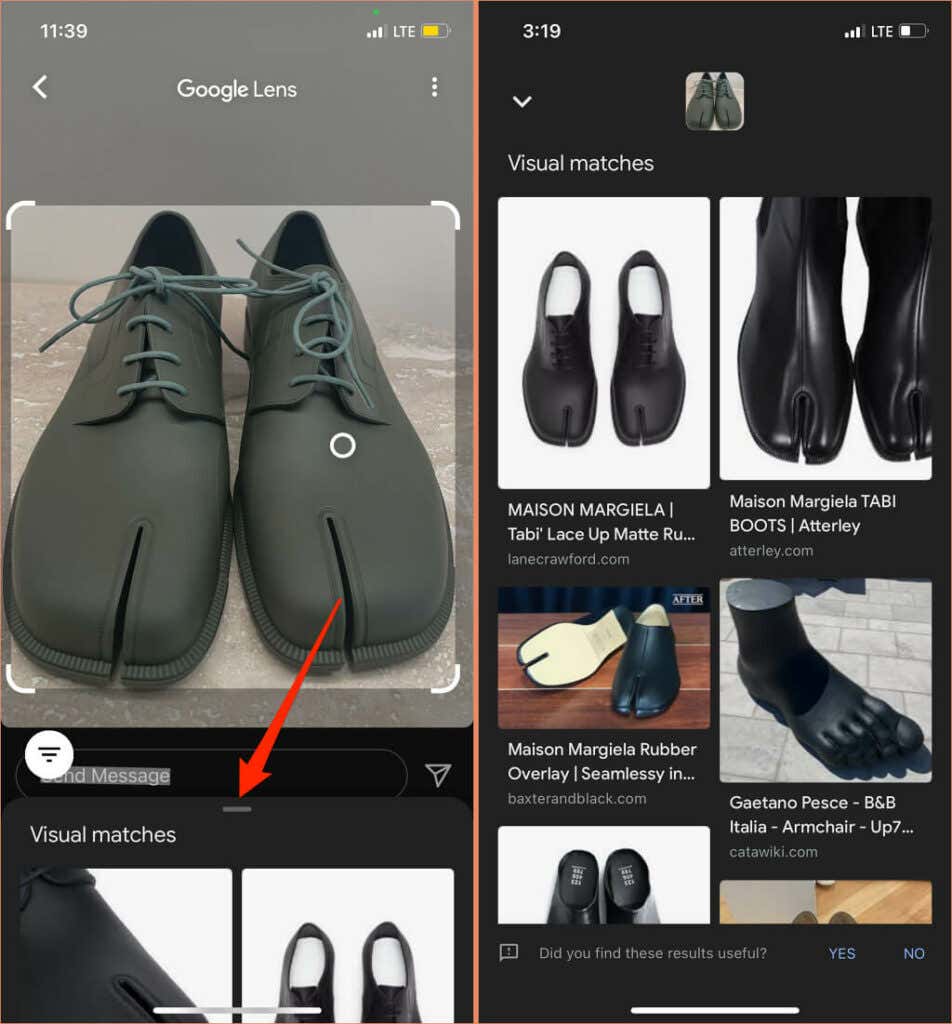
Swipe up the Visual matches card to view more results.
Google Chrome (Free)
If Google Chrome is your default iPhone browser, you might not need a dedicated reverse image search app to search by image on your iPhone. You can quickly determine the origin of an image on a website without having to download the image to your iPhone or iPad media library.
Simply tap and hold an image on any webpage and select Search Google for This Image in the context menu.
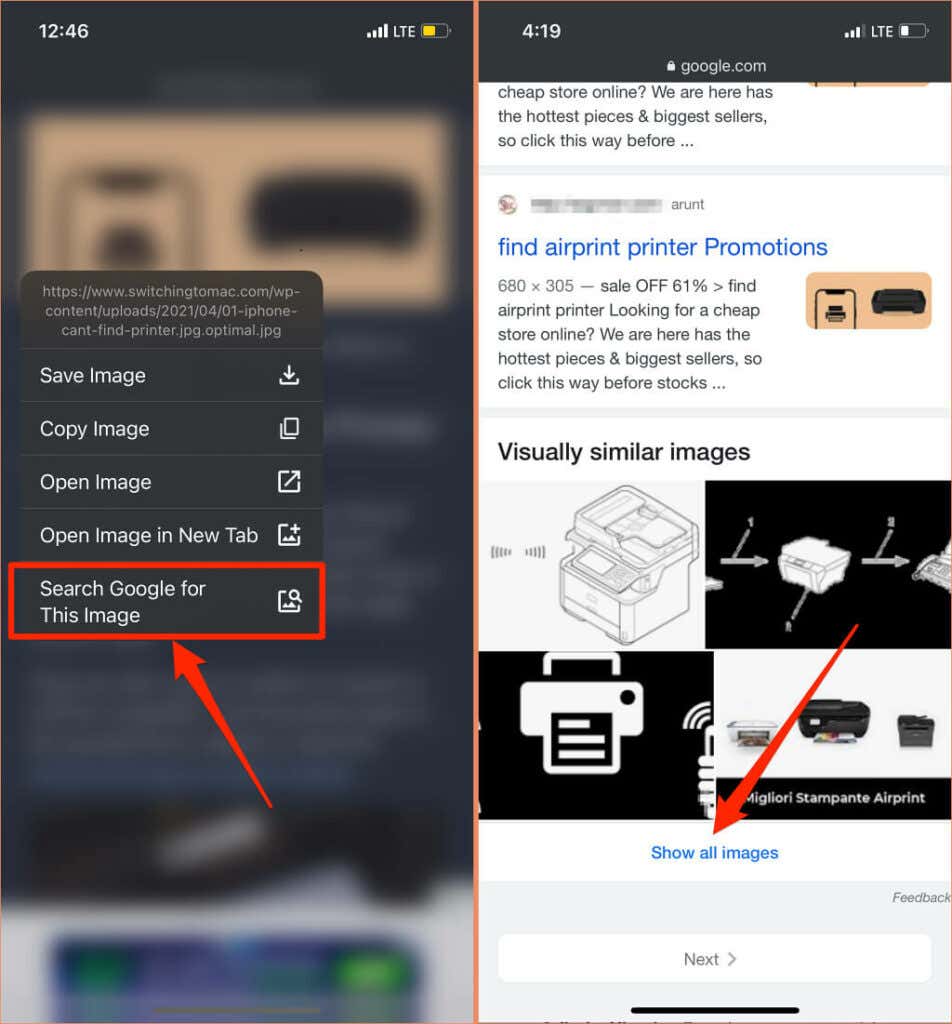
Chrome will open a new Google Search tab showing websites with the exact image or similar variations. Scroll to the “Visually similar images” section and select Show all images to view similar versions or lookalikes. You can reverse search an image on any website using this Chrome feature.
Reverse Image Search App (Free with In-App Purchases)
One unique feature of this app is its diverse reverse image search options. You can perform a reverse search on locally stored image files and pictures copied to your iPhone or iPad’s clipboard.
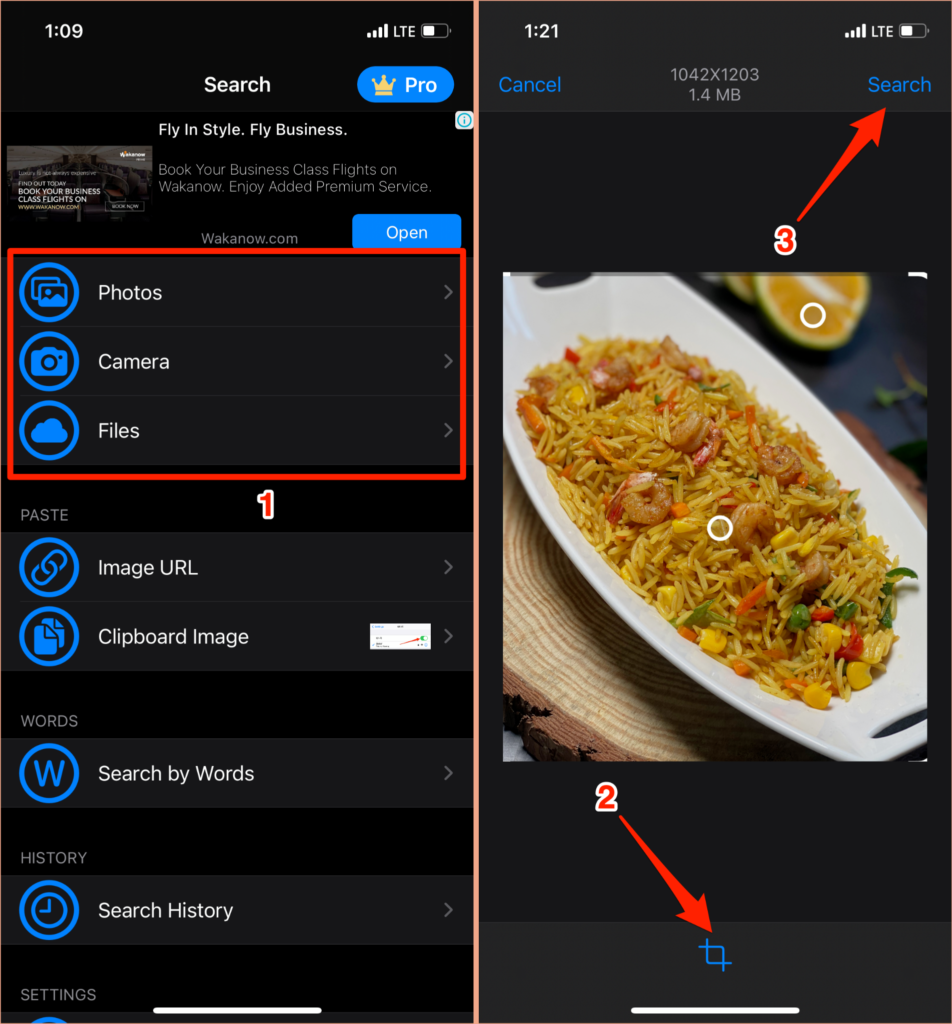
On the app’s dashboard, select Photos to choose a pre-existing image from your media library or tap Camera to take a new photo. Select Files to choose an image file in the Files app. Afterward, crop or resize the image to highlight the section you want to search for and tap Search.
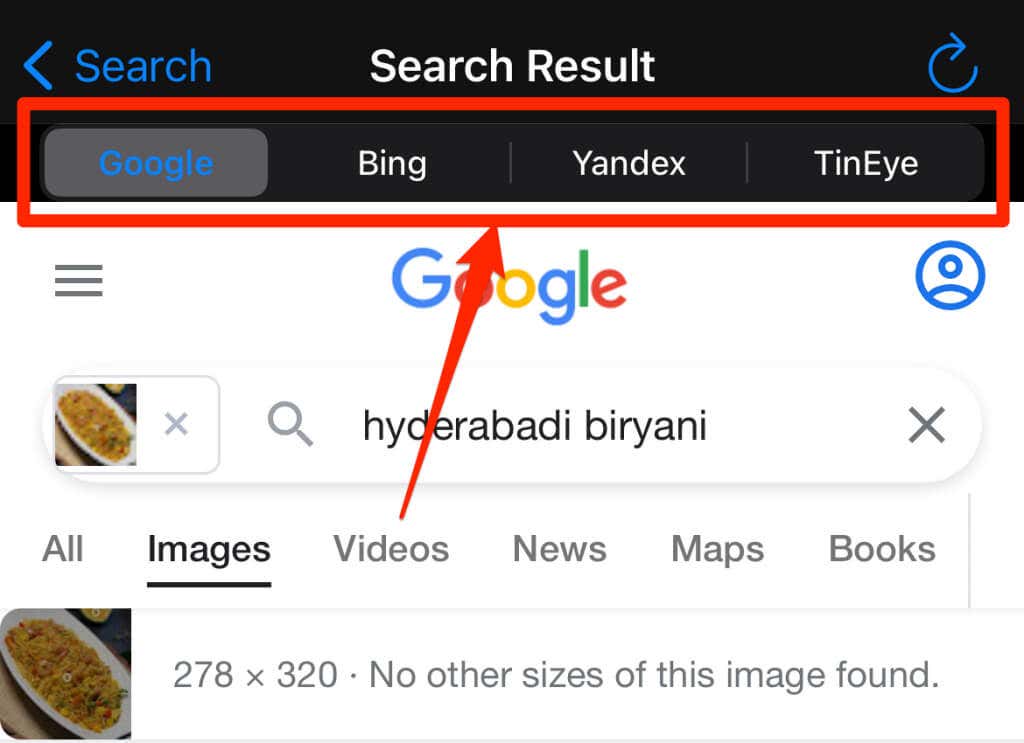
There’s a search engine tab on the results page where you can easily search the same image in three other search engines—Bing, Yandex, and TinEye.
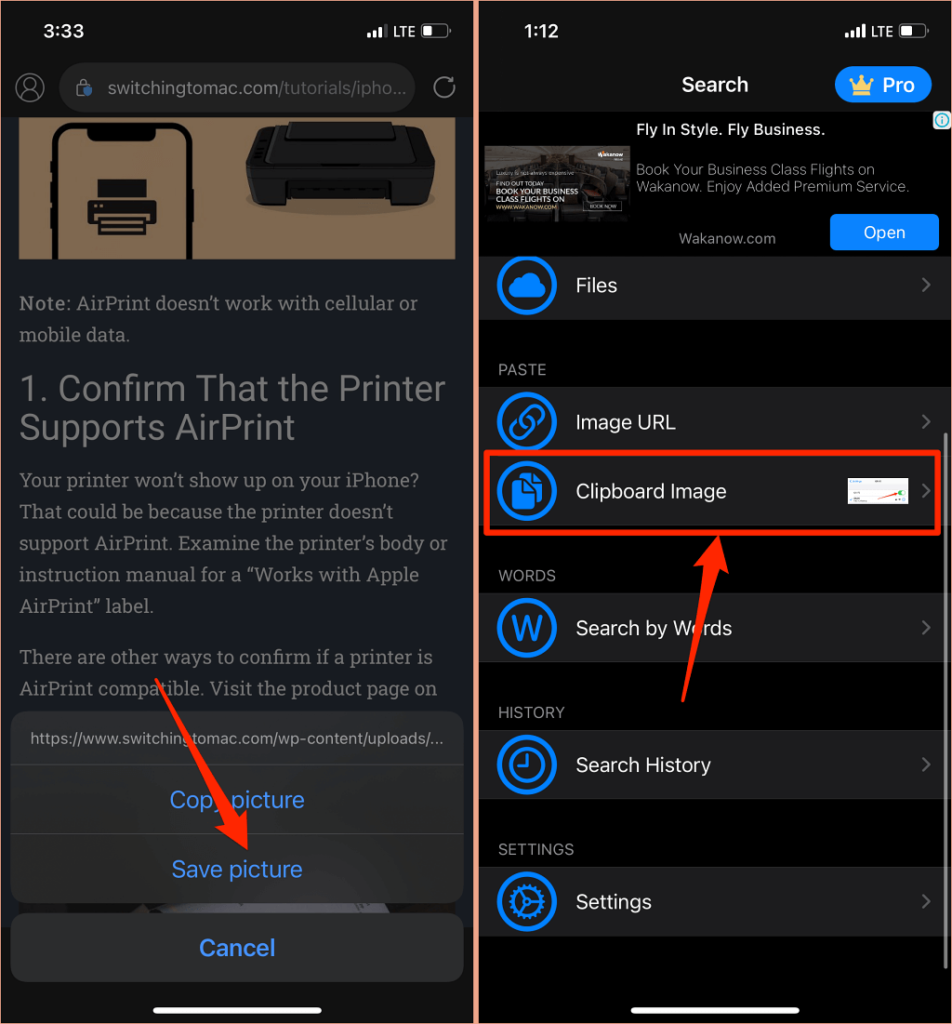
To reverse search from a webpage, tap and hold the image, select Copy Image (or Copy picture—depending on your browser), and open the Reverse Image Search app. Check the “Paste” section and you should see a preview of the image you just copied next to the Clipboard Image option. Tap Clipboard Image to reverse search the image.
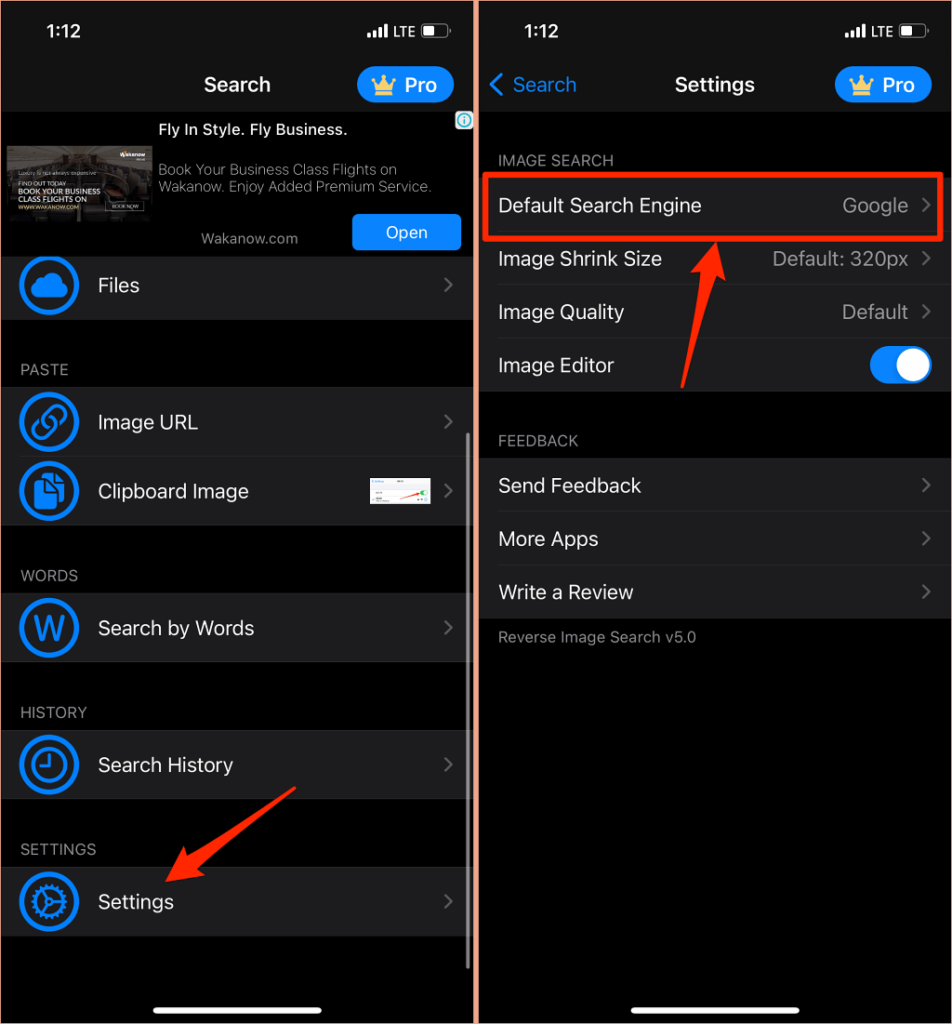
The Reverse Image Search App uses Google’s search engine by default but you can switch to another search engine.
Open the app’s Settings menu, select Default Search Engine, and choose other search engine options.
Note that advanced features like “Image URL” and “Clipboard Image” search are paid features. You can perform basic reverse image searches for free, but it comes at a price: incessant ads.
Reversee (Free with In-App Purchases)
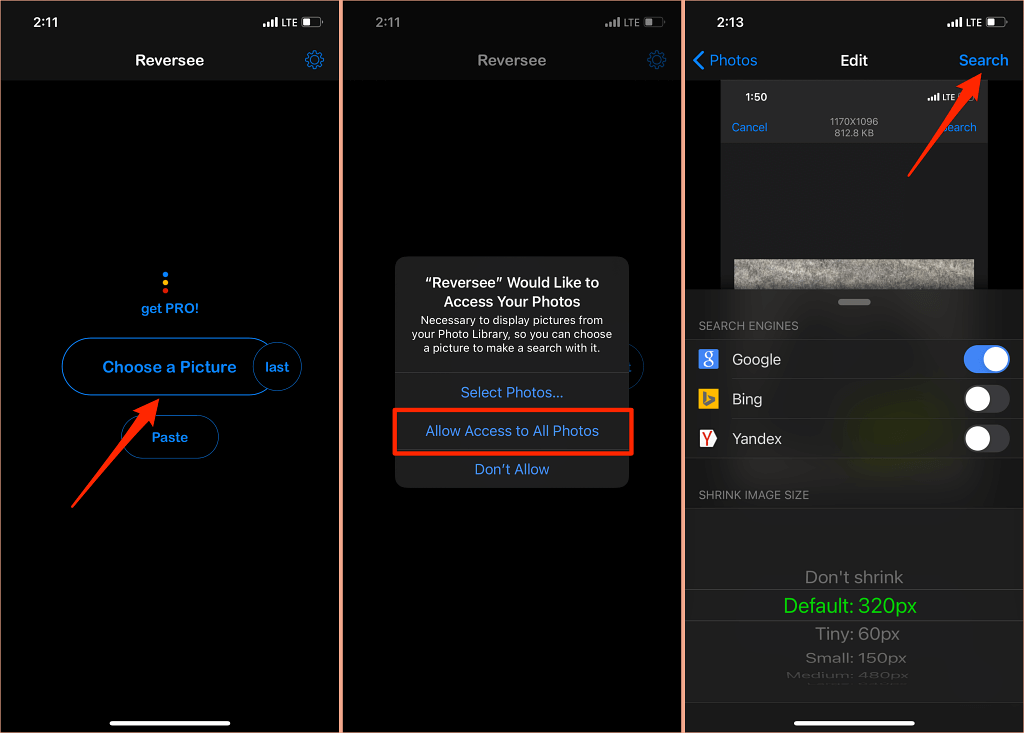
Reversee is another reverse image search app that’s worth mentioning. It’s a free app but you’ll need to pay a fee to remove ads, use multiple search engines, auto-crop images, and search images from your clipboard.
The app interface is tidy and it is super easy to use. However, the incessant pop-ups to upgrade to the pro version were a little annoying, particularly because the paid features are available for free in the Google and Google Chrome apps. Nonetheless, it’s an option worth going over.
Tap Choose a Picture, grant the app access to your photo library, and select and crop the photo you want to reverse search. Afterward, select your preferred search engine (Google is the only search engine available for free users), and tap Search.
Our Recommendation: Free Is Better
From our experiment, the Google app provided the most accurate results. Powered by Google Lens, the app automatically cropped the image and trimmed out redundant areas that may skew the results. In addition to being insanely accurate, the Google app is totally free to use, safe, and ad-free. There’s also no reduction in the quality of images on the results page. We totally recommend the Google app—a solid 9.8/10!


